前言
刚开始学习Tensorflow时都是跑官方教程上的例子,比如:mnist, cifar10,这些数据都是官方整理好的。后来由于项目需要处理自己的数据,整理自己的数据集,在网上查了很多资料,现在做一下总结。
整理数据
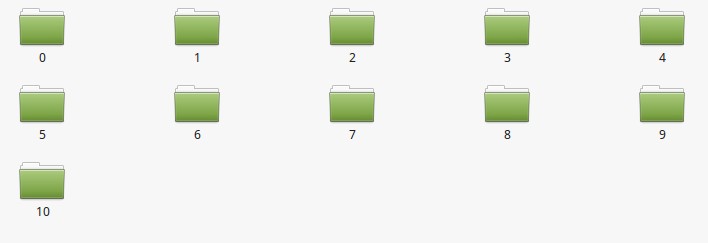
首先把自己的数据整理好,由于是分类问题,我把每个类的图片保存在一个文件夹,这部分我是手动加脚本实现。最后把自己的数据整理成下图这样。

Split data
在训练之前我就把数据分为 训练集、验证集、测试集,很多人混淆验证集和测试集,包括我之前为了让结果好看点,直接用测试集进行调参,当时还在网上看到很多人说这样可以,因为没有利用测试集训练网络,其实这样是不行的,验证集是验证当前网络训练状态,可以根据网络在训练集和验证集上的结果调参,但是测试集只有一个作用,就是训练完成后在测试集上进行评价,所以 不要滥用测试集。
获得所有图片的 绝对路径列表,然后按照一定比例分成三部分,这是网络的输入,而绝对路径中含有标签信息,把标签提取出来放在对应路径后面。
def getDatafile(file_dir, train_size, val_size):
    """Get list of train, val, test image path and label

    Parameters:
    -----------
        file_dir : str, file directory
        train_size : float, size of test set
        val_size : float, size of validation set

    Returns:
    --------
        train_img : str, list of train image path
        train_labels : int, list of train label
        test_img :
        test_labels :
        val_img :
        val_labels :
    """

    # images path list
    images_path = []
    # os.walk 遍历文件夹下的所有文件,包括子文件夹下的文件
    for root, sub_folders, files in os.walk(file_dir):
        for name in files:
            images_path.append(os.path.join(root, name))

    # labels,images path have label of image
    labels = []
    for image_path in images_path:
        label = int(image_path.split('/')[-2]) # 将对应的label提取出来
        labels.append(label)

    # 先将图片路径和标签合并
    temp = np.array([images_path, labels]).transpose()
    # 提前随机打乱
    np.random.shuffle(temp)

    images_path_list = temp[:, 0]    # image path
    labels_list = temp[:, 1]         # label

    # train val test split
    train_num = math.ceil(len(temp) * train_size)
    val_num = math.ceil(len(temp) * val_size)

    # train img and labels
    train_img = images_path_list[0:train_num]
    train_labels = labels_list[0:train_num]
    train_labels = [int(float(i)) for i in train_labels]

    # val img and labels
    val_img = images_path_list[train_num:train_num+val_num]
    val_labels = labels_list[train_num:train_num+val_num]
    val_labels = [int(float(i)) for i in val_labels]

    # test img and labels
    test_img = images_path_list[train_num+val_num:]
    test_labels = labels_list[train_num+val_num:]
    test_labels = [int(float(i)) for i in test_labels]

    # 返回图片路径列表和对应标签列表
    return train_img, train_labels, val_img, val_labels, test_img, test_labels
写入TFRecords文件
TFRecords是标准TensorFlow格式,这种方法可以使TensorFlow的数据集更容易与网络应用架构相匹配, 这是官方推荐一种数据格式,当然要用它了。
def _int64_feature(value):
    """Wrapper for inserting int64 features into Example proto."""
    if not isinstance(value, list):
        value = [value]
    return tf.train.Feature(int64_list=tf.train.Int64List(value=value))


def _bytes_feature(value):
    return tf.train.Feature(bytes_list=tf.train.BytesList(value=[value]))
这是官网上的两个函数,为写入TFRecords文件做准备。
TFRecords文件包含了tf.train.Example 协议内存块(protocol buffer) (协议内存块包含了字段 Features)。你可以写一段代码获取你的数据, 将数据填入到Example协议内存块(protocol buffer),将协议内存块序列化为一个字符串, 并且通过tf.python_io.TFRecordWriter class写入到TFRecords文件。
def convert_to_TFRecord(images, labels, save_dir, name):
    """Convert images and labels to TFRecord file.
    Parameters:
    -----------
        images : list of image path, string
        labels : list of labels, int
        save_dir : str, the directory to save TFRecord file
        name : str, the name of TFRecord file

    Returns:
    --------
        no return
    """

    filename = os.path.join(save_dir, 'cache', name + '.tfrecords')
    n_samples = len(labels)

    if np.shape(images)[0] != n_samples:
        raise ValueError('Images size {} does not match label size {}'.format(images.shape[0], n_samples))

    writer = tf.python_io.TFRecordWriter(filename)       #  TFRecordWriter class
    print 'Convert to TFRecords...'
    for i in xrange(0, n_samples):
        try:
            # 首先利用matplotlib读取图片,类型是np.ndarray(uint8)
            image = plt.imread(images[i])                # type(image) must be array
            image_raw = image.tobytes()                  # transform array to bytes
            label = int(labels[i])
            example = tf.train.Example(features=tf.train.Features(feature={
                            'label': _int64_feature(label),
                            'image_raw': _bytes_feature(image_raw)}))
            writer.write(example.SerializeToString())
        except IOError as e:
            print 'Could not read:{}'.format(images[i])
            print 'Skip it!'
    writer.close()
    print 'Done'
读取TFRecords文件
从TFRecords文件中读取数据, 可以使用tf.TFRecordReader的tf.parse_single_example解析器。 这个parse_single_example操作可以将Example协议内存块(protocol buffer)解析为张量。
def read_and_decode(TFRecord_file, batch_size, one_hot, standardized=True):
    """Read and decode TFRecord

    Parameters:
    -----------
        TFRecord_file : filename of TFRecord file, str
        batch_size : batch size, int
        one_hot : label one hot
        standardized : Standardized the figure,在这里设置一个是否标准化图片的参数,主要是
        方便测试这个函数并可视化读取的图片

    Returns:
    --------
        image_batch : a batch of image
        label_batch : a batch of label, one hot or not
    """
    # tf.name_scope('input') 把读取图片的过程包装在一个命名空间内是为了在tensorboard里好看
    with tf.name_scope('input'):

        # tf.train.string_input_producer
        # 将文件名列表交给tf.train.string_input_producer 函数.
        # 生成一个先入先出的队列,文件阅读器会需要它来读取数据。
        # Returns: A QueueRunner for the Queue is added to the current Graph's
        # QUEUE_RUNNER collection
        filename_queue = tf.train.string_input_producer([TFRecord_file])

        # init TFRecordReader class
        reader = tf.TFRecordReader()
        key, values = reader.read(filename_queue)    # filename_queue

        # parse_single_example将Example协议内存块(protocol buffer)解析为张量
        features = tf.parse_single_example(values,
                                           features={
                                               'label': tf.FixedLenFeature([], tf.int64),
                                               'image_raw': tf.FixedLenFeature([], tf.string),
                                           })
        # decode to tf.uint8
        image = tf.decode_raw(features['image_raw'], tf.uint8)  # tf.uint8
        # image cast
        image = tf.cast(image, tf.float32)              # tf.uint8 to tf.float32

        # reshape
        image = tf.reshape(image, [128, 128, 3])

        # standardized
        # 训练网络时,需要标准化
        # 测试这个函数时,需要把读取的图片显示出来,标准化后会显示异常,不需要标准化
        # 当训练出现异常时,也方便debug,观察训练数据是否异常
        if standardized:
            image = tf.image.per_image_standardization(image)

        # label
        label = tf.cast(features['label'], tf.int32)    # label tf.int32

        # create batchs of tensors
        # This function is implemented using a queue.A QueueRunner for the queue
        # is added to the current Graph's QUEUE_RUNNER collection.
        image_batch, label_batch = tf.train.batch([image, label],
                                                   batch_size=batch_size,
                                                   num_threads=4,
                                                   capacity=10000)

        # one hot
        if one_hot:
            n_classes = NUM_CLASSES
            label_batch = tf.one_hot(label_batch, depth=n_classes)

            # tf.one_hot之后label的类型变为tf.float32,后面运行会出bug
            # 所以在这里再次调用tf.cast
            label_batch = tf.cast(label_batch, tf.int32)

            label_batch = tf.reshape(label_batch, [batch_size, n_classes])
        else:
            label_batch = tf.reshape(label_batch, [batch_size])

    return image_batch, label_batch
值得注意的有两点,标准化和one_hot.
在主程序中调用read_and_decode()函数
线程和队列
TensorFlow的Session对象是可以支持多线程的,因此多个线程可以很方便地使用同一个会话(Session) 并且并行地执行操作。然而,在Python程序实现这样的并行运算却并不容易。所有线程都必须能被同步终止, 异常必须能被正确捕获并报告,会话终止的时候, 队列必须能被正确地关闭。
TensorFlow提供了两个类来帮助多线程的实现:tf.Coordinator和tf.QueueRunner。 从设计上这两个类必须被一起使用。
tf.Coordinator tf.QueueRunner
tf.train函数添加 QueueRunner 到你的数据流图中
QueueRunner: Holds a list of enqueue operations for a queue, each to be in a thread.
-
Coordinator: 这是负责在收到任何关闭信号的时候,让所有的线程都知道。最常用的是在发生异常时这 种情况就会呈现出来,比如说其中一个线程在运行某些操作时出现错误(或一个普通的Python异常)。
-
QueueRunner: 用来协调多个工作线程同时将多个张量推入同一个队列中。
tf.train.start_queue_runners
在你运行任何训练步骤之前,必须调用 tf.train.start_queue_runners 函数, 否则数据流图将一直挂起。tf.train.start_queue_runners 这个函数将会启动输入管道的线程,填充样本到队列中, 以便出队操作可以从队列中拿到样本。这种情况下最好配合使用一个tf.train.Coordinator,这样可以在 发生错误的情况下正确地关闭这些线程。
tf.train.start_queue_runners函数作用:要求数据流图中每个QueueRunner去开始它的线程运行入队操作。
官方推荐模板
# Create the graph, etc.

init_op = tf.initialize_all_variables()

# Create a session for running operations in the Graph.
sess = tf.Session()

# Initialize the variables (like the epoch counter).
sess.run(init_op)

# Start input enqueue threads.
coord = tf.train.Coordinator()
threads = tf.train.start_queue_runners(sess=sess, coord=coord)

try:
    while not coord.should_stop():
        # Run training steps or whatever
        sess.run(train_op)

except tf.errors.OutOfRangeError:
    print 'Done training -- epoch limit reached'
finally:
    # When done, ask the threads to stop.
    coord.request_stop()

# Wait for threads to finish.
coord.join(threads)
sess.close()
测试
首先将自己的数据写入TFRecords文件
# Main
if __name__ == '__main__':
    # figure dir
    project_dir = os.getcwd()
    figure_dir = os.path.join(project_dir, 'figure')

    # get list of images path and list of labels
    train_img, train_labels, val_img, val_labels, test_img, test_labels = getDatafile(figure_dir,
                                                                                      train_size=0.67,
                                                                                      val_size=0.1)
    # convert TFRecord file
    TFRecord_list = ['train', 'val', 'test']
    img_labels_list = [[train_img, train_labels], [val_img, val_labels], [test_img, test_labels]]
    save_dir = os.getcwd()
    for index, TFRecord_name in enumerate(TFRecord_list):
        convert_to_TFRecord(img_labels_list[index][0], img_labels_list[index][1],
                            save_dir,
                            TFRecord_name)
调用read_and_decode()函数从TFRecords文件中读取数据,并利用matplotlib将图片展示出来
import os
import numpy as np
import tensorflow as tf
import matplotlib.pyplot as plt

from frame.frame_input import read_and_decode


if __name__ == '__main__':
    # 随机设置,一个batch内样本数
    BATCH_SIZE = 6
    # file dir
    project_dir = os.getcwd()
    # TFRecord file
    TFRecord_file_list = ['train.tfrecords', 'val.tfrecords', 'test.tfrecords']
    TFRecord_file = os.path.join(project_dir, 'cache', TFRecord_file_list[0])

    # 调用read_and_decode()函数
    image_batch, label_batch = read_and_decode(TFRecord_file,
                                               batch_size=BATCH_SIZE,
                                               one_hot=True,
                                               standardize=False)

    # 启动一个session
    with tf.Session() as sess:
				# 控制读取的batch数
        i = 0
				# Coordinator()
        coord = tf.train.Coordinator()
				# 调用start_queue_runners启动QUEUERUNNER
        threads = tf.train.start_queue_runners(sess=sess, coord=coord)

        try:
            while not coord.should_stop() and i < 1:
                # run
                img, label = sess.run([image_batch, label_batch])

                # 可视化图片和标签
                img_ = np.uint8(img)              # float to uint8
                label_ = np.argmax(label, 1)      # one hot to int

                # just test one batch
                for j in xrange(BATCH_SIZE):
                    print 'label: {}'.format(label_[j])
										# 第一维是batch_size
                    plt.imshow(img_[j, ...])
                    plt.show()
                i += 1

        except tf.errors.OutOfRangeError:
            print 'Done!'
        finally:
            coord.request_stop()

        coord.join(threads)
最后注意一点,代码中的中文注释只是帮助理解,运行时不要有任何中文,很容易出bug.
后记
以前都是用Keras搭建很简单的模型,Kears确实对新手很友好,代码封装的很好用,但是缺乏一定灵活性。我也是刚接触TensorFlow,文中难免有错误,还请批评指正。
本作品采用 知识共享署名 3.0 中国大陆许可协议 进行许可。